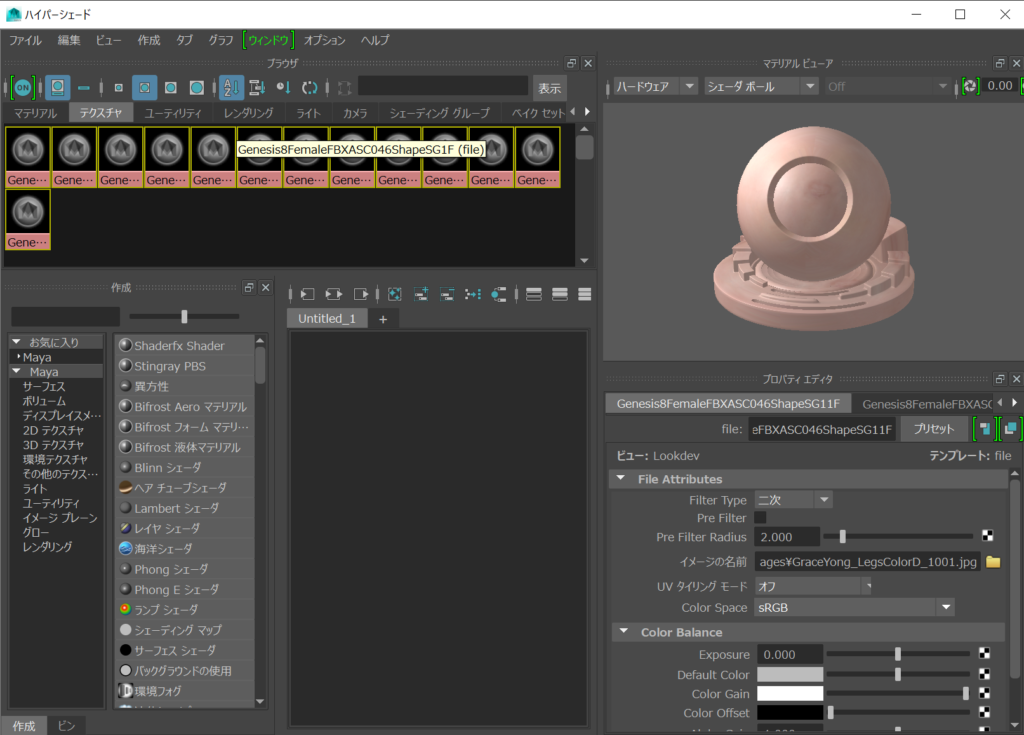
Select HyperShade Textures And Do Script import maya.cmds as cmds
import pymel.core as pm
import os
def remap_selected_texture(z_path):
# figure out what's selected
selected = pm.ls(sl=True)
workspace_path = cmds.workspace(query=True, rootDirectory=True)
print("workspace_path= "+workspace_path)
for item in selected:
test_path = pm.getAttr(item+".ftn")
fileName = test_path.split('/')[-1]
fileName = fileName.replace('//', '')
fileName = fileName.replace('/', '')
print("fileName2= "+fileName)
#if ':' not in test_path:
if(fileName=="GraceYong_ArmsColorD1001.jpg"):
fileName="GraceYong_ArmsColorD_1001.jpg"
if (1==1):
#print("fileName1= "+fileName)
#new_path = os.path.join(z_path, 'cartoon_room', second)
new_path = os.path.join(workspace_path,z_path, fileName)
new_path = new_path.replace('\\', '/')
new_path = new_path.replace('//', '/')
relative_path = os.path.join(z_path, fileName)
relative_path = relative_path.replace('\\', '/')
new_path = new_path.replace('//', '/')
if os.path.exists(new_path):
if(fileName==""):
print("item= "+str(item)+" is No fileName= "+ fileName)
cmds.select( str(item), r=True )
cmds.delete( str(item) )
else:
print("new_path= "+new_path+' is exists! OK')
pm.setAttr(item+'.ftn', new_path)
#pm.setAttr(item+'.ftn', relative_path)
else:
print("new_path= "+new_path+ ' not exists NG' )
if os.path.exists(test_path):
pass
else:
PersonalIndex=test_path.find("Personal")
if(PersonalIndex==-1):
pass
else:
print("test_path= "+test_path+ ' not exists NG' )
pm.setAttr(item+'.ftn', "")
cmds.select( str(item), r=True )
cmds.delete( str(item) )
cmds.select(selected)
print("--------------remap_selected_texture----------END")
remap_selected_texture("GraceYong.images")
モデルフォルダの自動認識と出力フォルダ引数のパターン
#remap_selected_filenode_texture_path
import maya.cmds as cmds
import pymel.core as pm
import os

def remap_selected_texture(z_path):

    # figure out what's selected
    selected = pm.ls(sl=True)
    # workspace_project_path
    workspace_path = cmds.workspace(query=True, rootDirectory=True)
    print("workspace_path= "+workspace_path)
    # ma_file_path
    ma_file_path=cmds.file(q=True, sn=True)
    print("ma_file_path= "+ma_file_path)
    ma_file_path_arr = ma_file_path.split('/')
    ma_Folder=ma_file_path_arr[-2]

    print("ma_Folder= "+ma_Folder)
    for item in selected:
        item_path = pm.getAttr(item+".ftn")
        print("item_path= "+item_path)
        item_path_arr = item_path.split('/')
        texFolderName = item_path_arr[-2]
        print("texFolderName= "+texFolderName)
        fileName = item_path_arr[-1]
        print("fileName= "+fileName)
        fileName = fileName.replace('//', '')
        fileName = fileName.replace('/', '')
        print("fileName2= "+fileName)


        #if ':' not in test_path:

        if (1==1):

            #print("fileName1= "+fileName)


            #new_path = os.path.join(z_path, 'cartoon_room', second)
            new_path = os.path.join(workspace_path,z_path, fileName)
            new_path = new_path.replace('\\', '/')
            new_path = new_path.replace('//', '/')
            #relative_path = os.path.join(z_path, fileName)
            #====================================================
            relative_path = ma_Folder+"/"+z_path+"/"+fileName
            #====================================================
            print("relative_path= "+relative_path)
            #relative_path = relative_path.replace('\\', '/')
            abs_path = os.path.abspath(workspace_path+"/"+relative_path)
            abs_path = abs_path.replace('//', '/')
            print(" abs_path= "+abs_path)
            new_path= abs_path
            print(" new_path= "+new_path)
            print("----------------------------end--------------------------")

            if os.path.exists(new_path):
                if(fileName==""):
                    print("item= "+str(item)+" is No fileName= "+ fileName)
                    cmds.select( str(item), r=True )
                    cmds.delete( str(item) )
                else:
                    print("new_path= "+new_path+' is exists! OK')
                    pm.setAttr(item+'.ftn', new_path)

            else:
                print("new_path= "+new_path+ ' not exists NG' )

    cmds.select(selected)
    print("--------------remap_selected_texture----------END")

remap_selected_texture("texture")
Scene押してシーンディレクトリ取得、押してWalkでテクスチャファイルをwalkで自動検索
#remap_selected_filenode_texture_path
import maya.cmds as cmds
import pymel.core as pm
import os

def dir_walk(walkDir,TextureFileName):
    resultPath=""
    for curDir, dirs, files in os.walk(walkDir):
        print('===================')
        print("現在のディレクトリ: " + curDir)
        curDir=curDir.replace("\\","/")
        curDir_arr=curDir.split("/")

        curDir_endDirName = curDir_arr[-1]
        print("curDir_endDirName= "+curDir_endDirName)
        if(curDir_endDirName==".mayaSwatches"):
            print("処理をスキップします。。。")
            pass
        else:

            print("内包するディレクトリ:" + str(dirs))
            print("内包するファイル: " + str(files))
            for fileName in files:
                if(fileName==TextureFileName):
                    print("Hit : fileName= "+fileName+ "== TextureFileName= "+TextureFileName)
                    resultPath=curDir+"/"+fileName
        print('===================')
    return resultPath

def remap_selected_texture2(sceme_path):

    # figure out what's selected
    selected = cmds.ls(sl=True)
    # workspace_project_path
    workspace_path = cmds.workspace(query=True, rootDirectory=True)
    print("workspace_path= "+workspace_path)
    # ma_file_path
    ma_file_path=cmds.file(q=True, sn=True)
    print("ma_file_path= "+ma_file_path)
    ma_file_path_arr = ma_file_path.split('/')
    ma_Folder=ma_file_path_arr[-2]

    print("ma_Folder= "+ma_Folder)
    for item in selected:
        item_path = cmds.getAttr(item+".ftn")
        print("item_path= "+item_path)
        item_path_arr = item_path.split('/')
        texFolderName = item_path_arr[-2]
        print("texFolderName= "+texFolderName)
        fileName = item_path_arr[-1]
        print("fileName= "+fileName)
        fileName = fileName.replace('//', '')
        fileName = fileName.replace('/', '')
        print("fileName2= "+fileName)

        fixTexturePath=dir_walk(sceme_path,fileName)
        print("fixTexturePath= "+fixTexturePath)
        #if ':' not in test_path:

        if (1==1):

            #print("fileName1= "+fileName)


            #new_path = os.path.join(z_path, 'cartoon_room', second)
            #new_path = os.path.join(workspace_path,z_path, fileName)
            new_path = fixTexturePath
            new_path = new_path.replace('\\', '/')
            new_path = new_path.replace('//', '/')
            #relative_path = os.path.join(z_path, fileName)
            #====================================================
            #relative_path = ma_Folder+"/"+z_path+"/"+fileName
            #====================================================
            #print("relative_path= "+relative_path)
            #relative_path = relative_path.replace('\\', '/')
            #abs_path = os.path.abspath(workspace_path+"/"+relative_path)
            #abs_path = abs_path.replace('//', '/')
            #print(" abs_path= "+abs_path)
            #new_path= abs_path
            print(" new_path= "+new_path)
            print("----------------------------end--------------------------")

            if os.path.exists(new_path):
                if(fileName==""):
                    print("item= "+str(item)+" is No fileName= "+ fileName)
                    cmds.select( str(item), r=True )
                    cmds.delete( str(item) )
                else:
                    print("new_path= "+new_path+' is exists! OK')
                    #cmds.setAttr(item+'.ftn', new_path)
                    cmds.setAttr(item+'.fileTextureName', new_path,type='string')
            else:
                print("new_path= "+new_path+ ' not exists NG' )

    cmds.select(selected)
    print("--------------remap_selected_texture----------END")


def remap_fileNode_texture(self):
    text_Field_id="remap_selected_filenode_texture_path_Window|USD_layout|pathTxtFld"
    textField_outputFolder = cmds.textField(text_Field_id, q=True, text=True)
    remap_selected_texture2(textField_outputFolder)

def get_scenePath():
    scenefilePath = cmds.file(q=1, sceneName=1)
    mayaPath,mayaFile = os.path.split(scenefilePath)
    #mayaPath = mayaPath + "/Usd/"
    #mayaPath = mayaPath + "/"
    mayaPath=os.path.abspath(mayaPath)
    mayaPath=mayaPath.replace('\\', '/')
    print("mayaPath= "+mayaPath)
    mayaPath_len=len(mayaPath)
    last_str=mayaPath[mayaPath_len-1:]
    print("mayaPath= "+mayaPath+ " last_str= "+last_str)
    if(last_str=="/"):
        pass
    else:
        mayaPath=mayaPath+"/"

    return mayaPath

def btn_scene(self):
    scenePath = get_scenePath()

    #textureFolder= cmds.textField('textField_outputFolder', q=True, text=True)


    #lastExportDirPath=scenePath+textureFolder+"/"


    set_lastExportDirPath(scenePath)


def set_lastExportDirPath(lastExportDirPath):

    selectList=cmds.ls(sl=True)
    if(str(selectList)== "[]"):
        print("なにも選択されていません。0 set_lastExportDirPath")


    text_Field_id="remap_selected_filenode_texture_path_Window|USD_layout|pathTxtFld"
    cmds.textField(text_Field_id, edit=True, text=lastExportDirPath)
    cmds.select(selectList)


def createWindow():
    scenefilePath = cmds.file(q=1, sceneName=1)

    USD_window = cmds.window("remap_selected_filenode_texture_path_Window", widthHeight=(400, 200))
    USD_layout = cmds.columnLayout("USD_layout",adjustableColumn=True, parent=USD_window)
    cmds.text (label="選択したハイパーシェードのテクスチャのパスを置換するツールです。", align='left', parent=USD_layout)
    cmds.text (label="シーンのパス以下のフォルダーから検索して自動的に置換します。", align='left', parent=USD_layout)
    cmds.separator(parent=USD_layout)
    cmds.text (label="", align='left', parent=USD_layout)

    cmds.text (label="1、Sceneを押してください。", align='left', parent=USD_layout)
    cmds.button(label="Scene", command=btn_scene, parent=USD_layout)
    text_field = cmds.textField("pathTxtFld", parent="USD_layout",text="")
    #cmds.text (label="2、テクスチャフォルダ名を指定してください。", align='left', parent=USD_layout)
    #text_field = cmds.textField("textField_outputFolder", parent="USD_layout",text="texture")
    cmds.separator(parent=USD_layout)
    cmds.text (label="", align='left', parent=USD_layout)


    cmds.text (label="2、HyperShadeのテクスチャTabで(例:file1,file2,複数可)を選択して、ボタンを押してください。", align='left', parent=USD_layout)
    #CheckBox_Absolute_Path_Bool = cmds.checkBox('CheckBox_Absolute_Path', q=True, value=True)
    cmds.button(label="Remap FileNode Texture ", command=remap_fileNode_texture, parent=USD_layout)

    #cmds.separator(parent=USD_layout)

    #cmds.button(label="Add USD Referernce/Payload... ", command=add_prim_xform_for_stage_layer, parent=USD_layout)

    cmds.showWindow(USD_window)
    return None


def remap_selected_filenode_texture_path():
    if cmds.window("remap_selected_filenode_texture_path_Window",exists=True):
        cmds.deleteUI("remap_selected_filenode_texture_path_Window")
    createWindow()


remap_selected_filenode_texture_path()