プロジェクトのサンプルはアンリアルクエスト5のプロジェクトを使いました。
https://historia.co.jp/unrealquest05 のDiscordから #プロジェクトデータ配布のチャンネルからDLできます。Discordサーバーが消えた場合はあとで考えます。
使用バージョンは
UE5.2.0
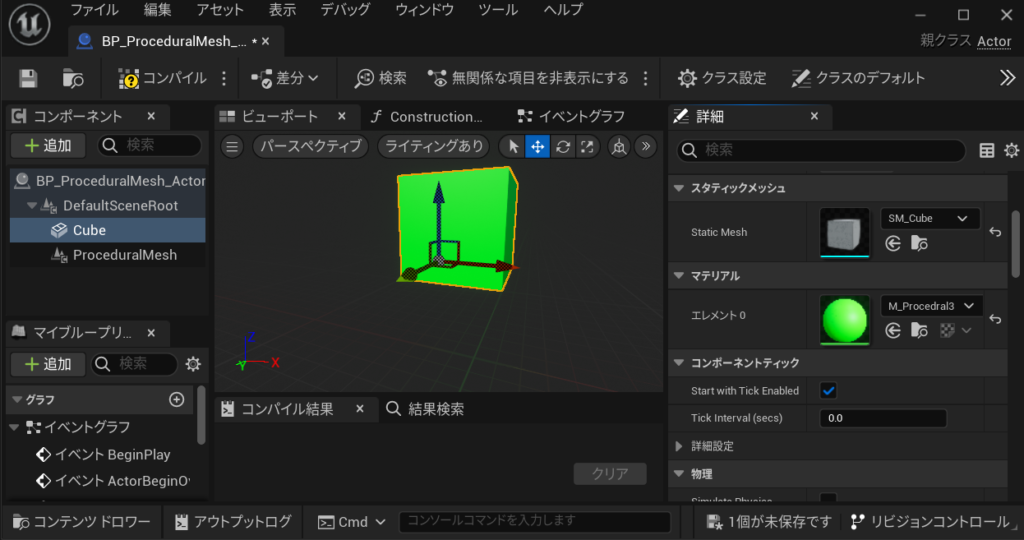
切られるオブジェクトを用意する
ブループリントクラス>Actorで作成します。
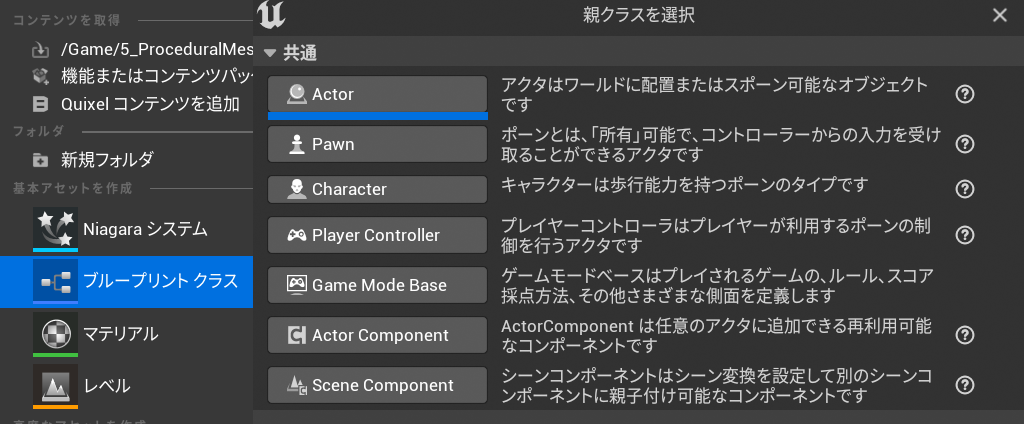
名前はBP_ProceduralMesh_Actor としました。
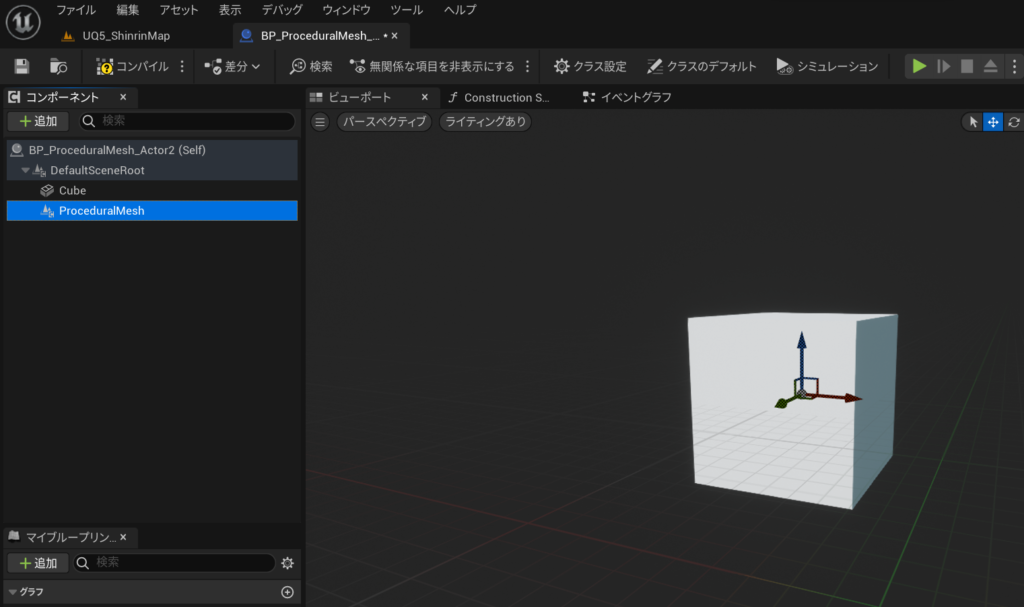
作成したブループリントを開き
DefaultSceneRootの下に
ProceduralMeshとCubeまたはキューブを追加します。
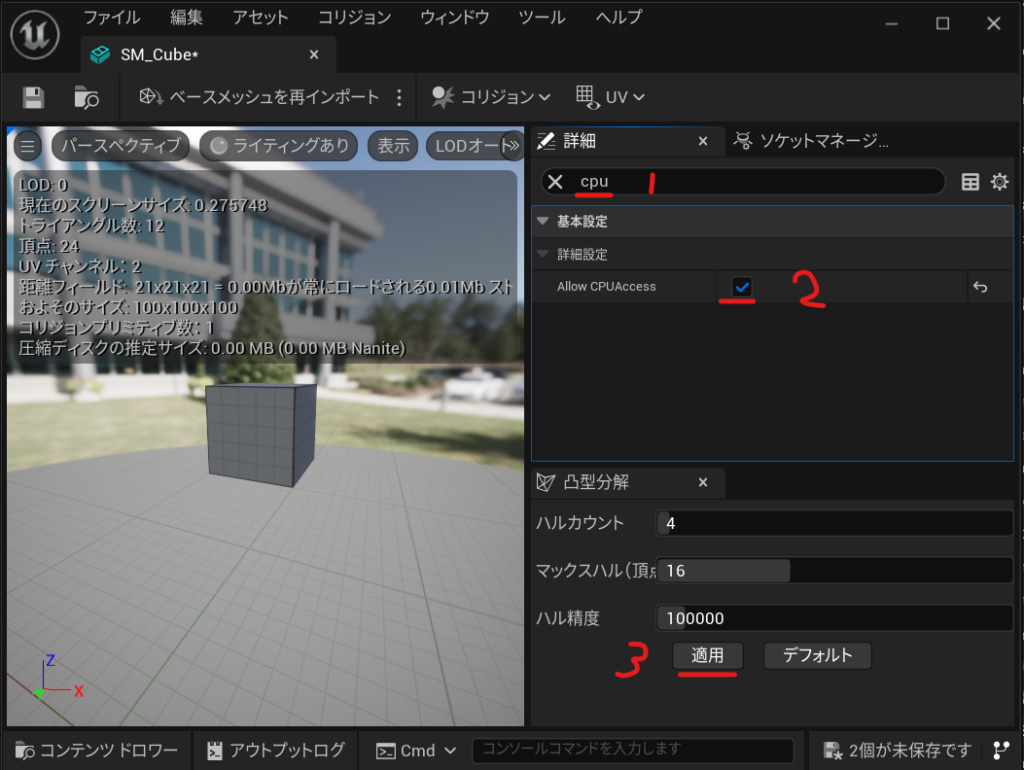
Cubeコンポーネントの設定
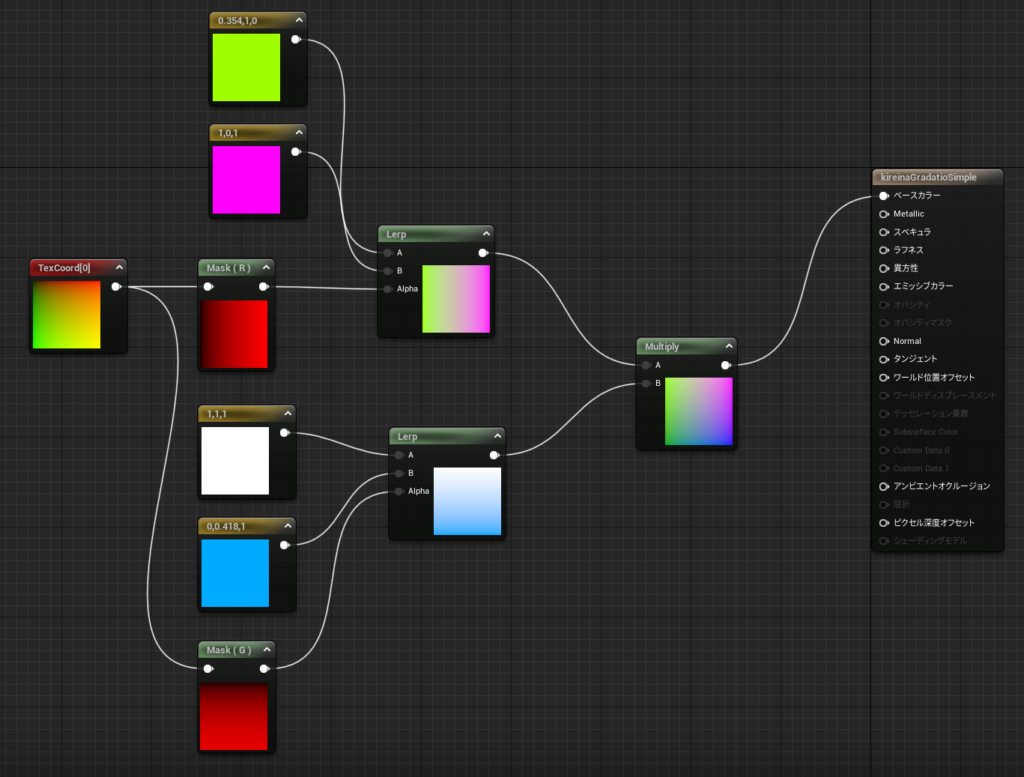
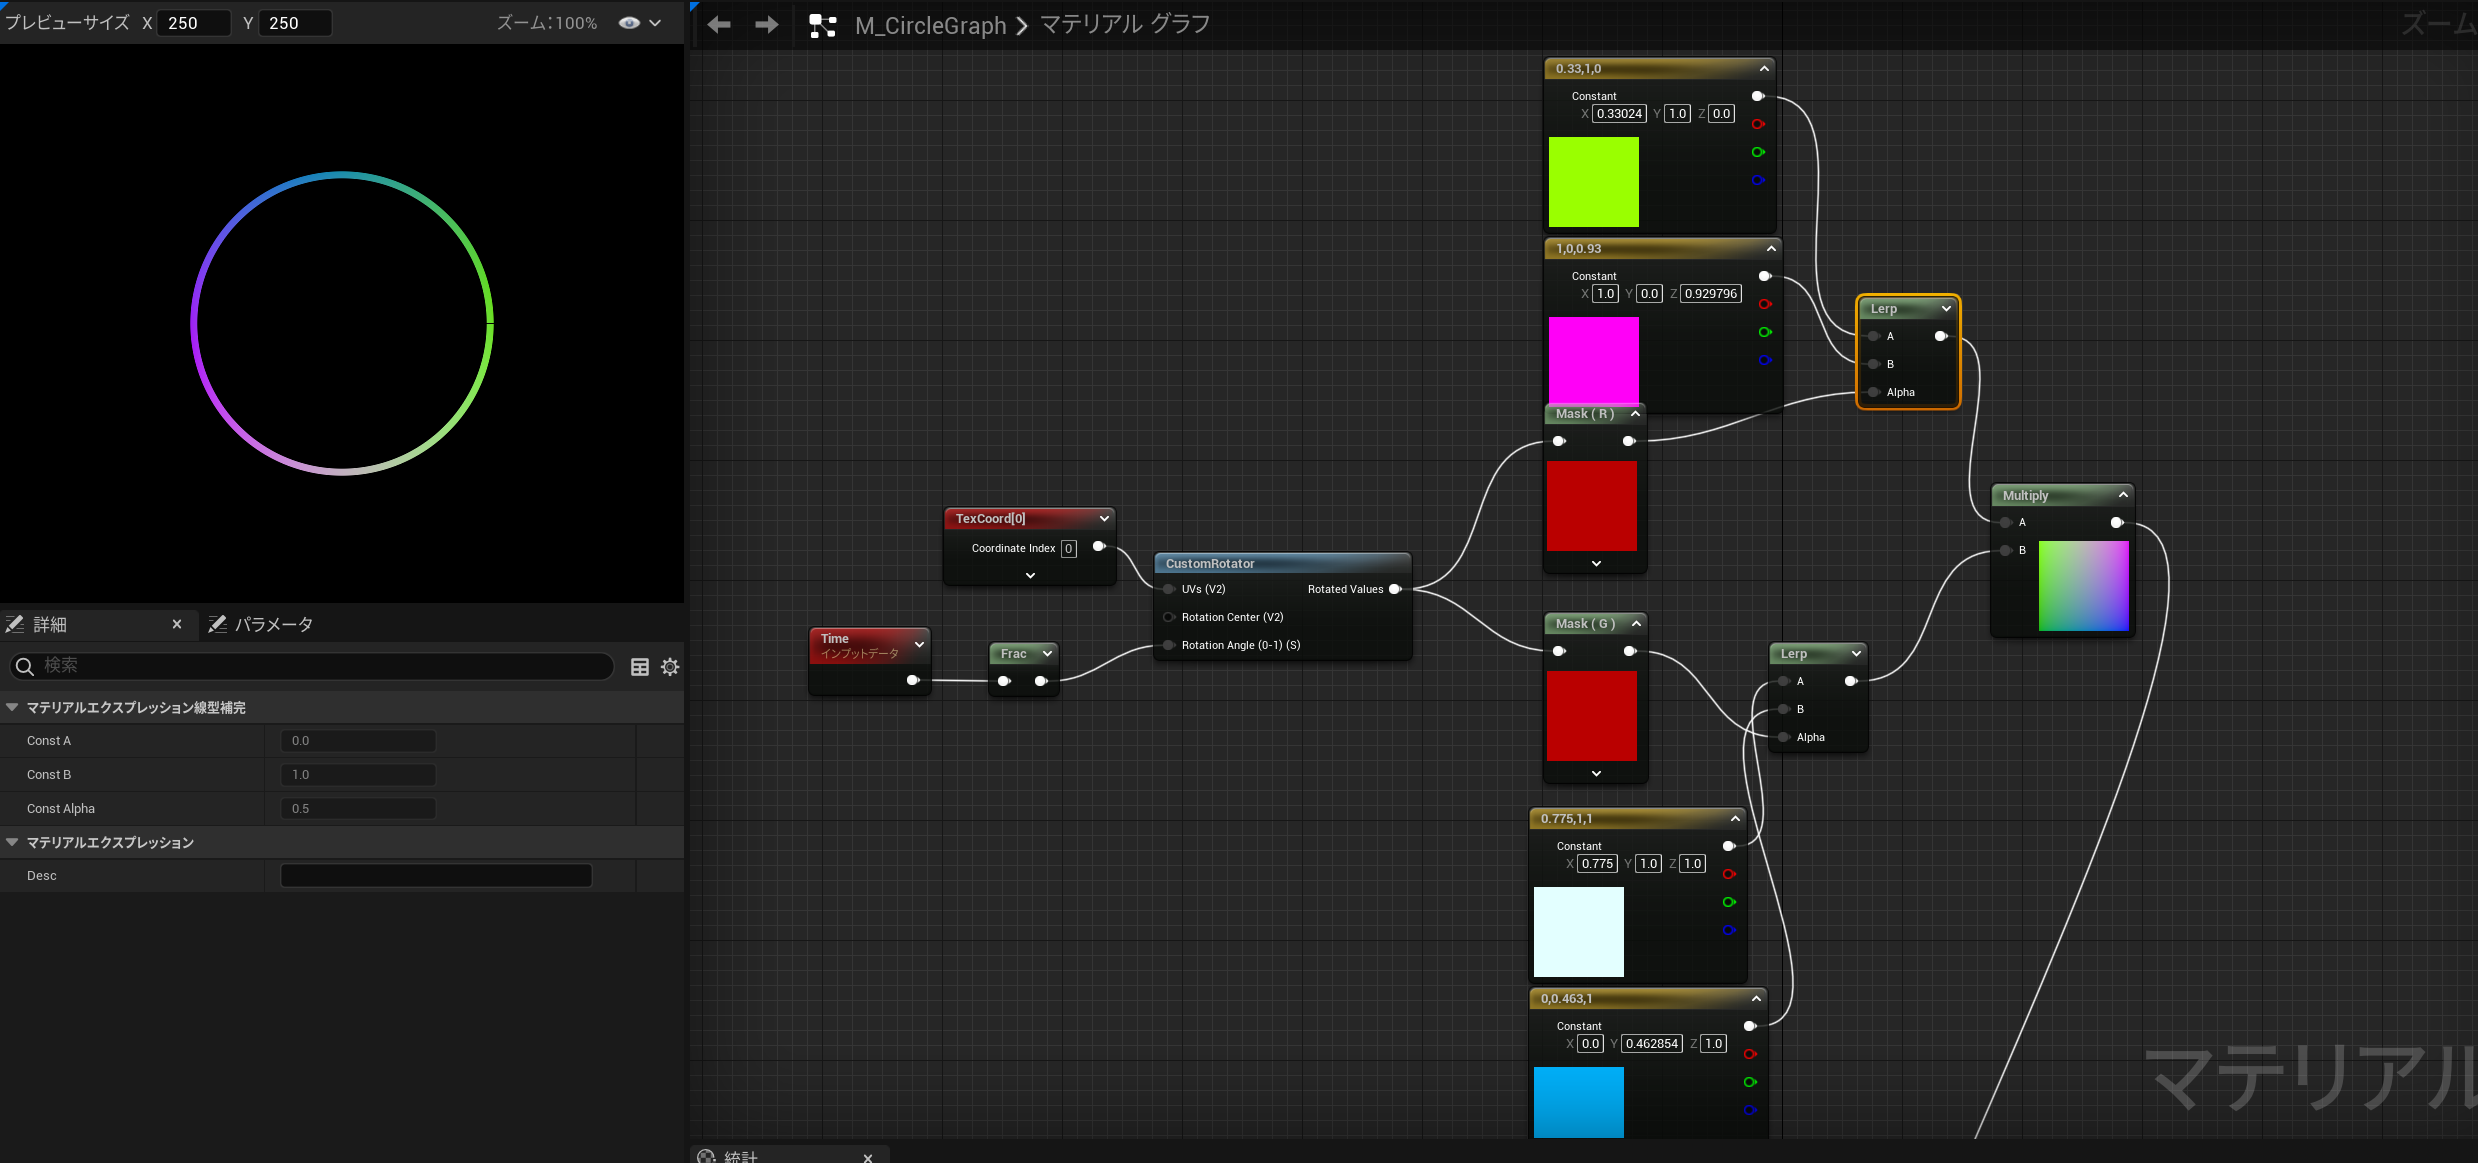
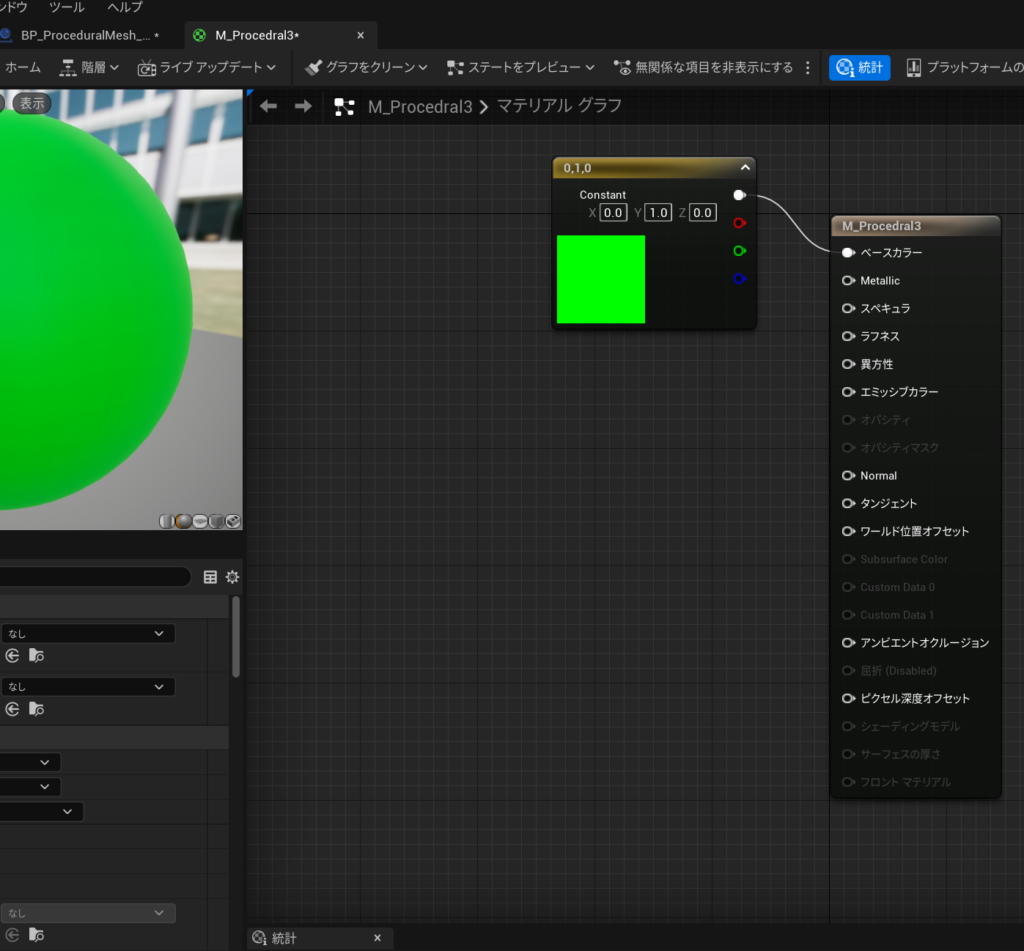
M_Procedralというマテリアルを作って
/Game/UnrealQuest5/Props/LevelPrototyping/Meshes/SM_Cubeをコピーしてきて
CubeコンポーネントのスタティックメッシュをSM_Cubeに変更
コピーしてきたSM_Cubeの設定を行います。
AllowCPUAccess にチェックを入れてCPUからでもメッシュ情報にアクセスできるようにします。
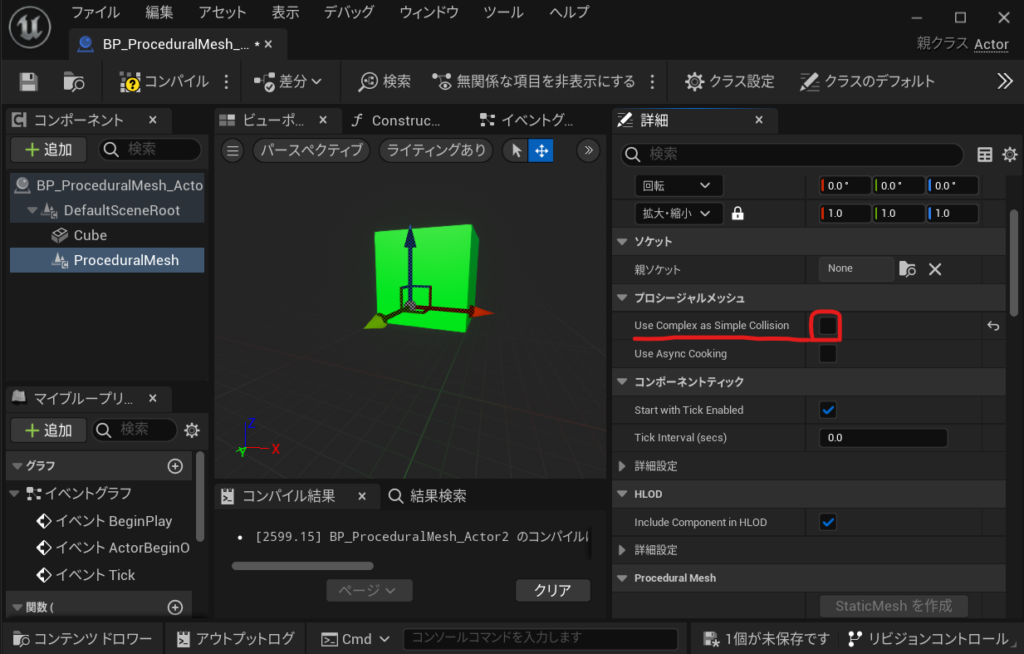
Procedural Meshコンポーネントの設定
Procedural Meshコンポーネントの Use Complex as Simple Collisionのチェックを外します。
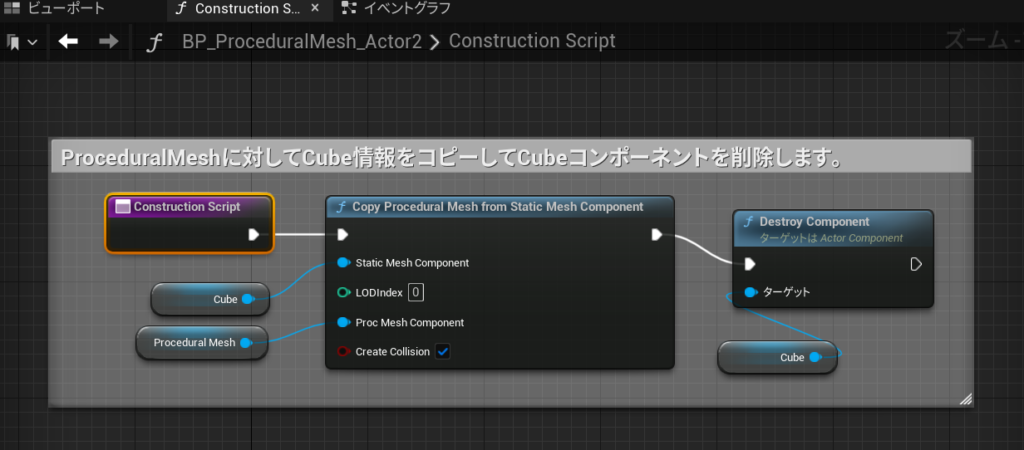
コンストラクタのノードを設定する
ProceduralMeshに対してCube情報をコピーしてCubeコンポーネントを削除します。
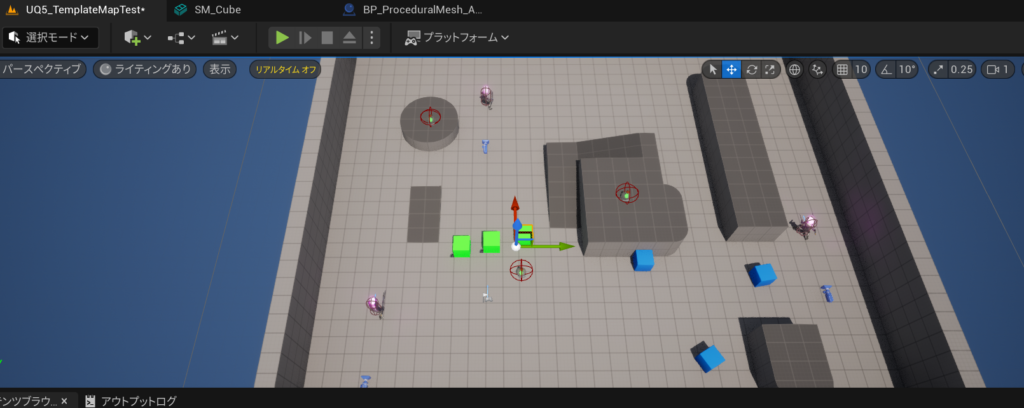
コピーしてきたレベルに作成したBPをおいてみました。
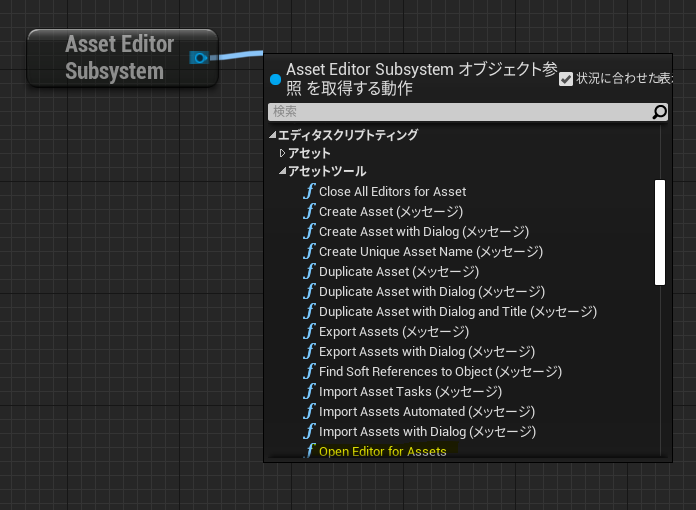
BP_UQ5_Playerを開いて
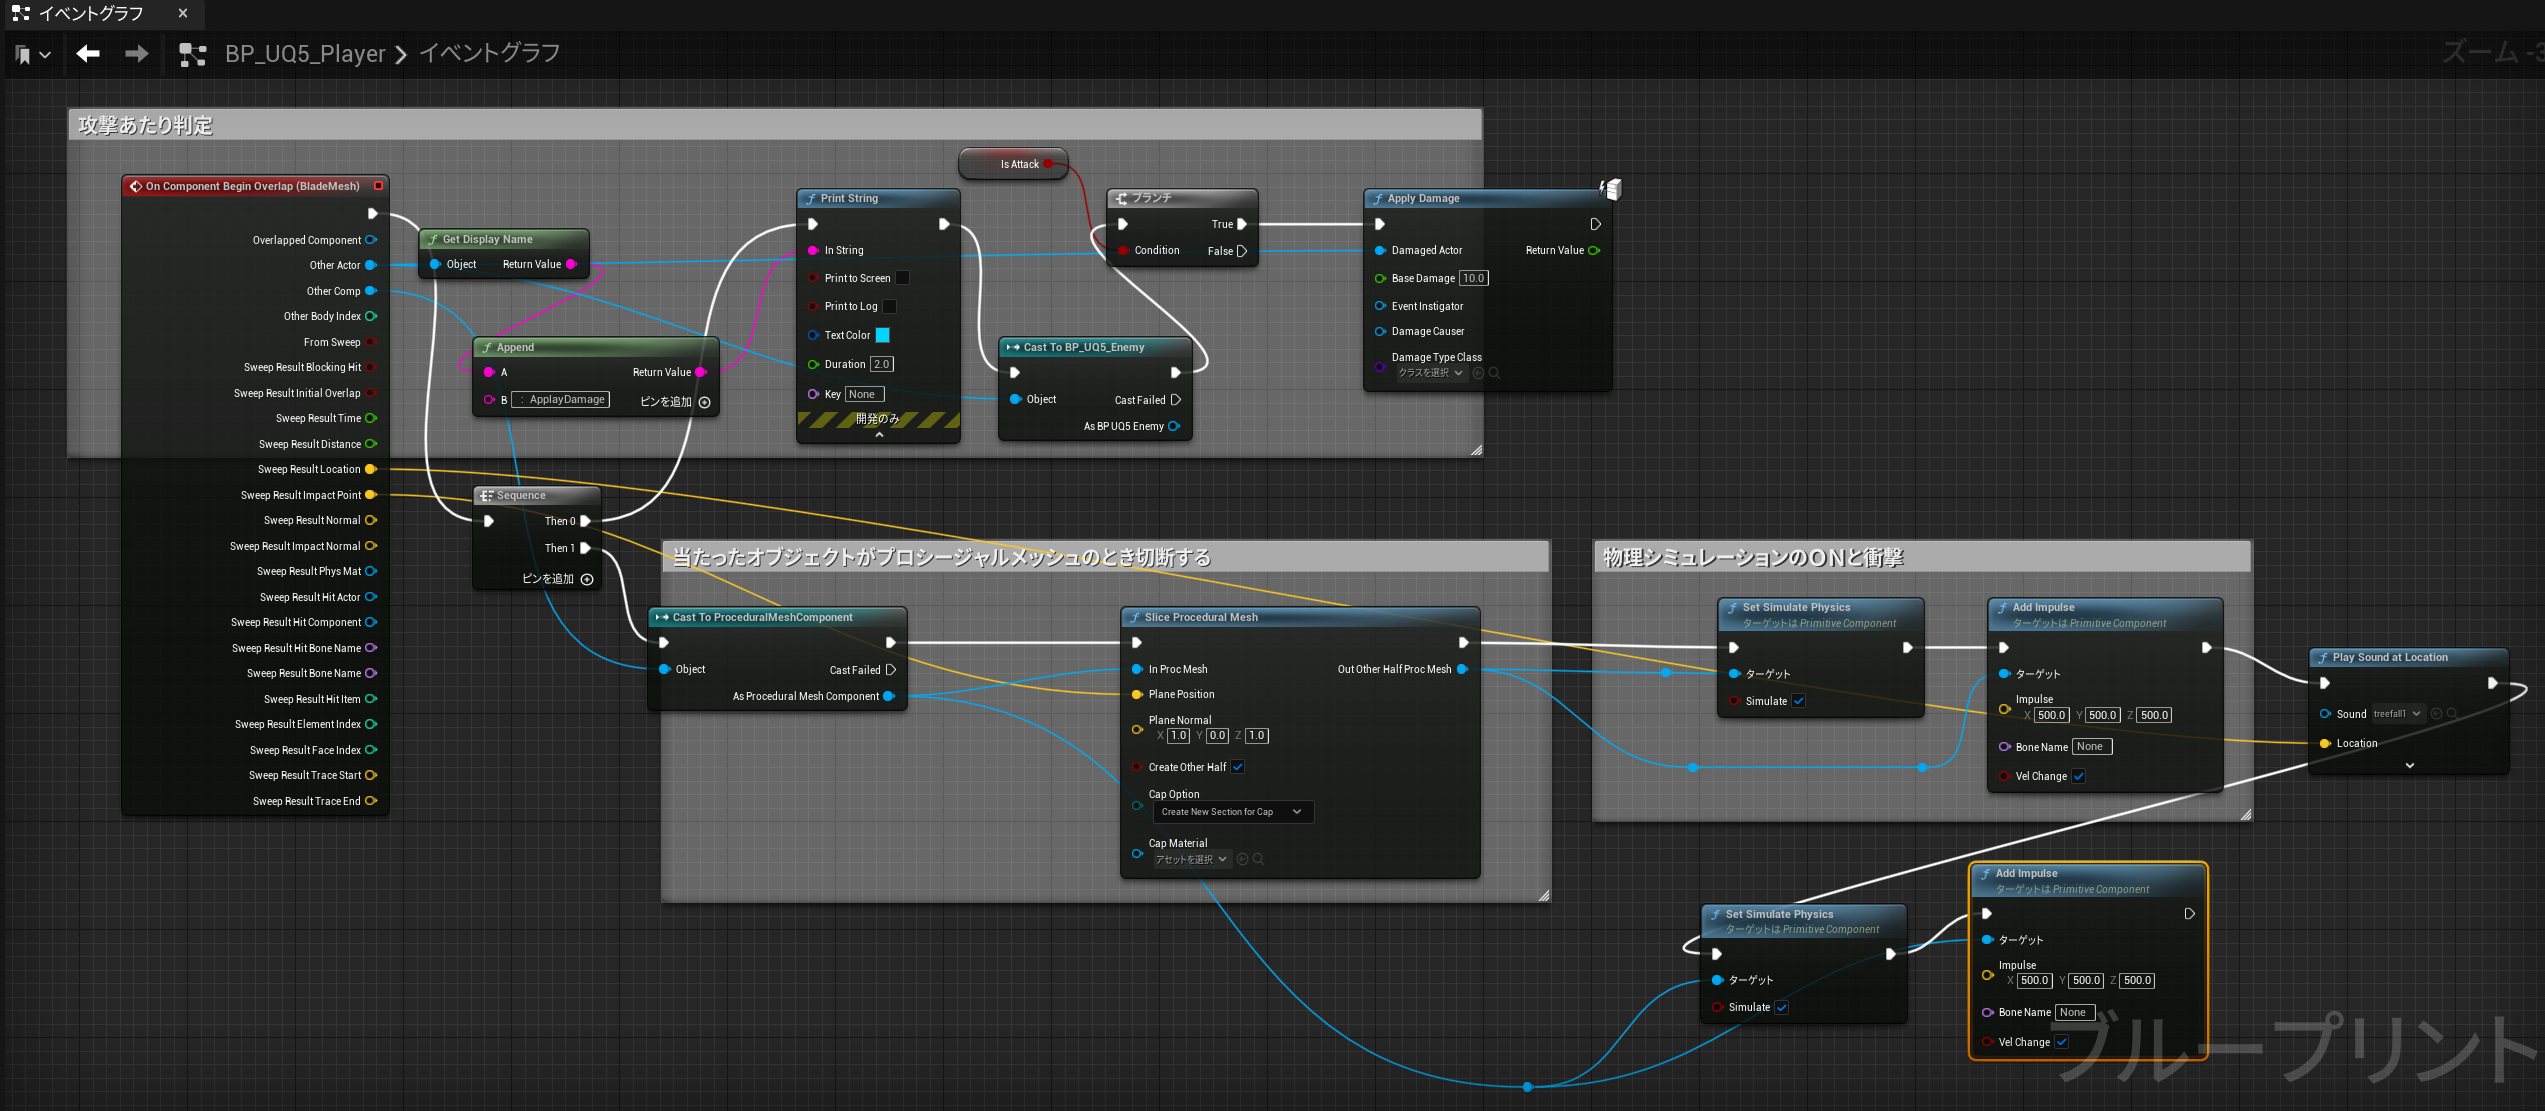
BladeMeshのOnConponentBeginOverlapをクリックしてノードを作ります。
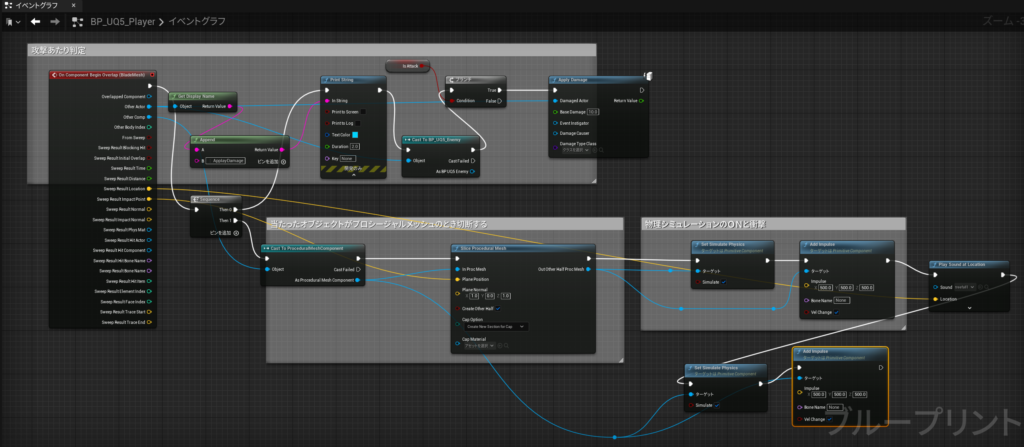
これ動くのSet Simulate Physics だけだったので、結局
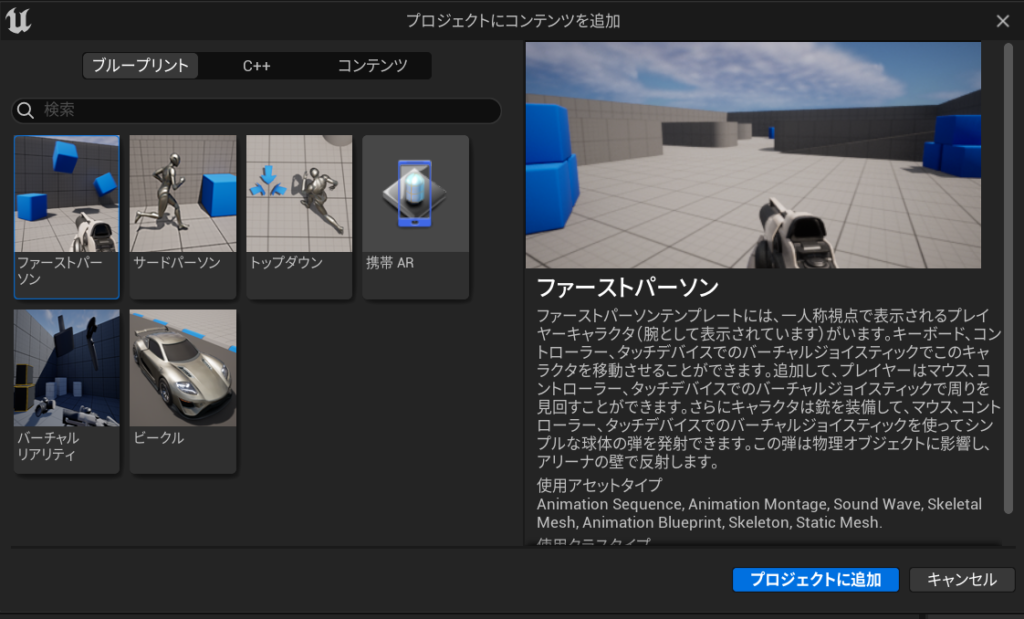
ファーストパーソン を追加
/Game/FirstPerson/Blueprints/BP_FirstPersonProjectile をコピーして
BP_ProceduralBulletとする
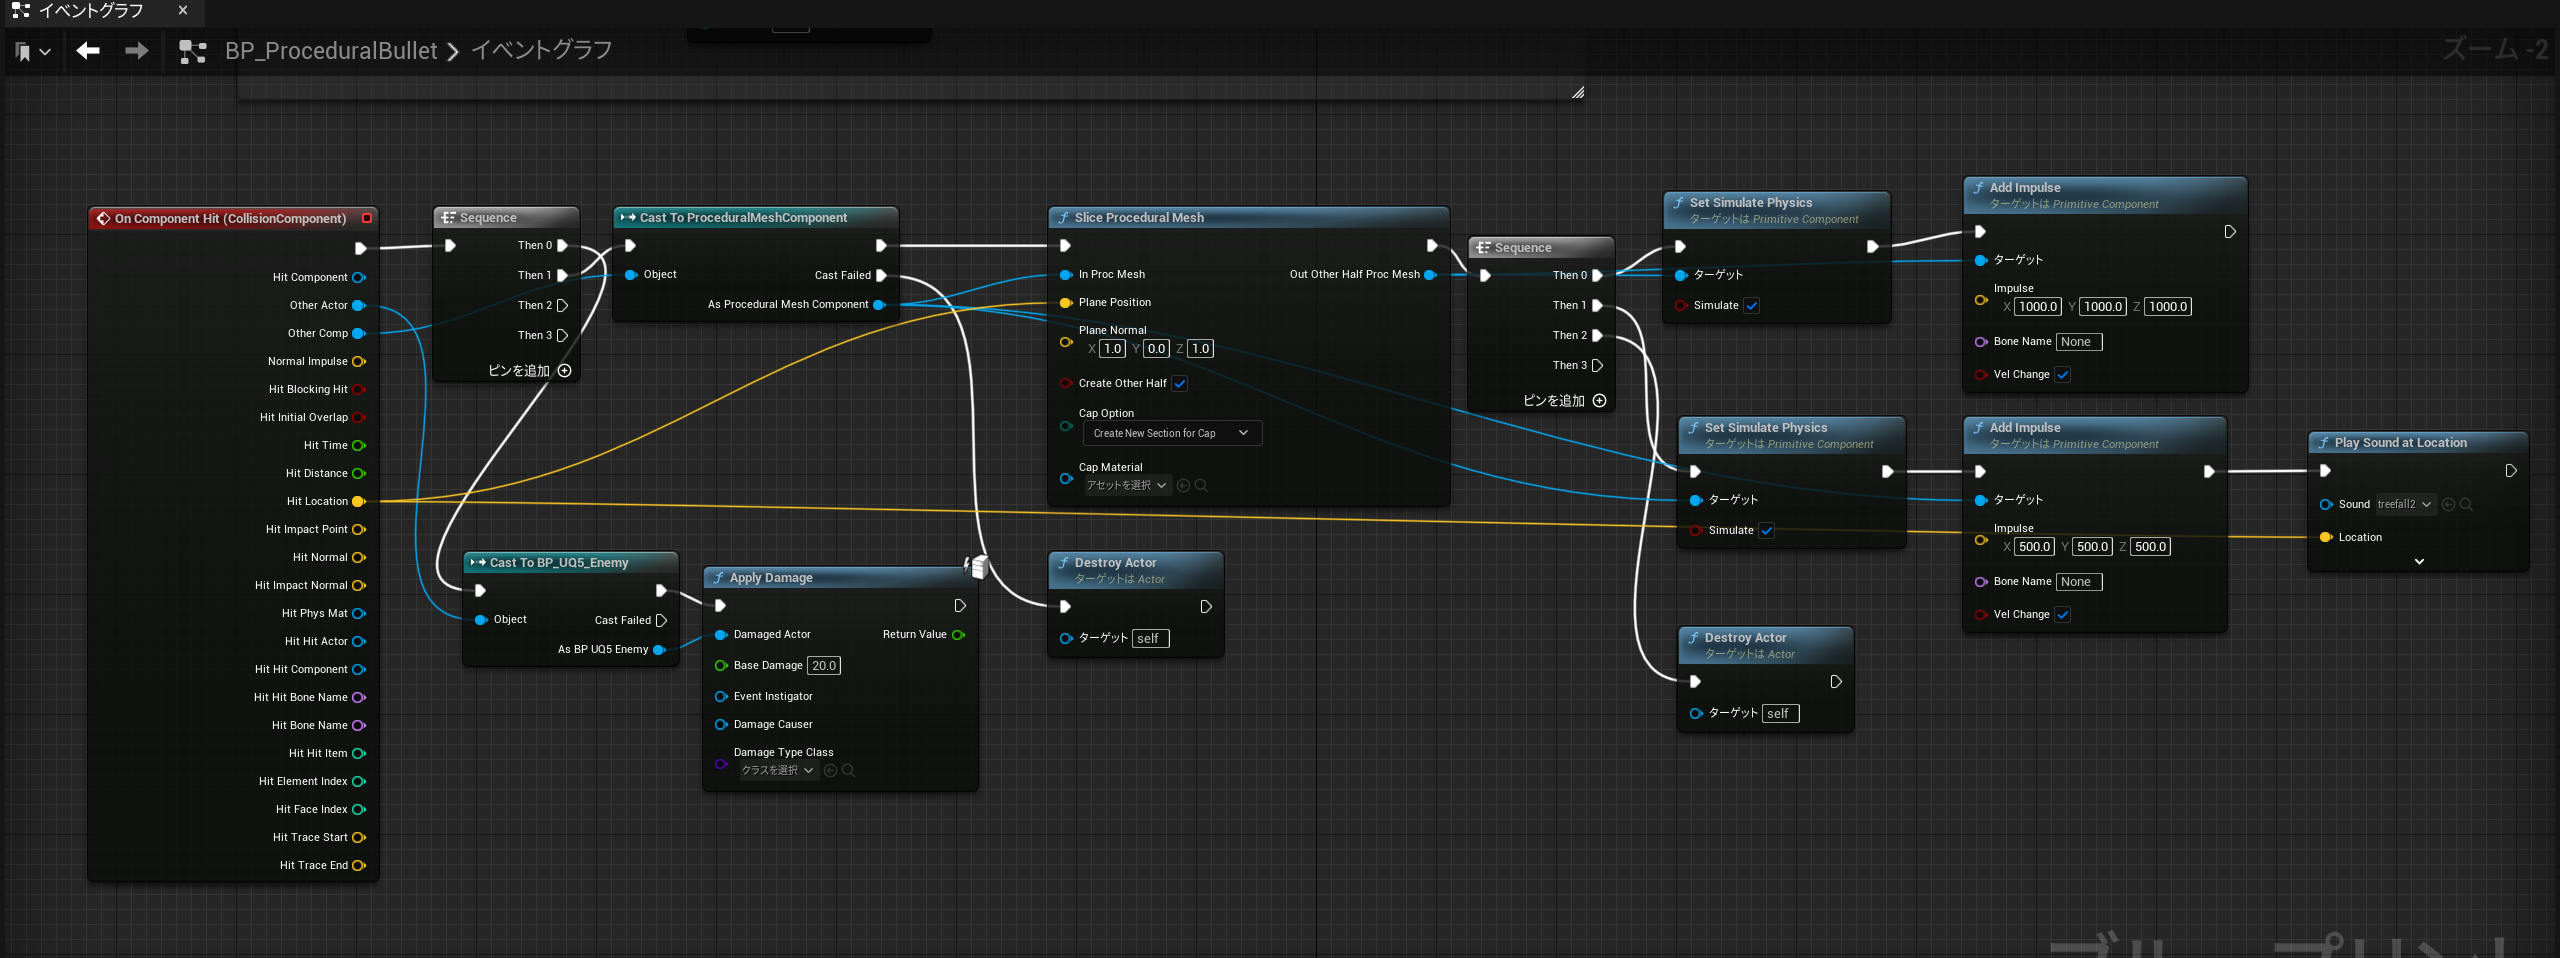
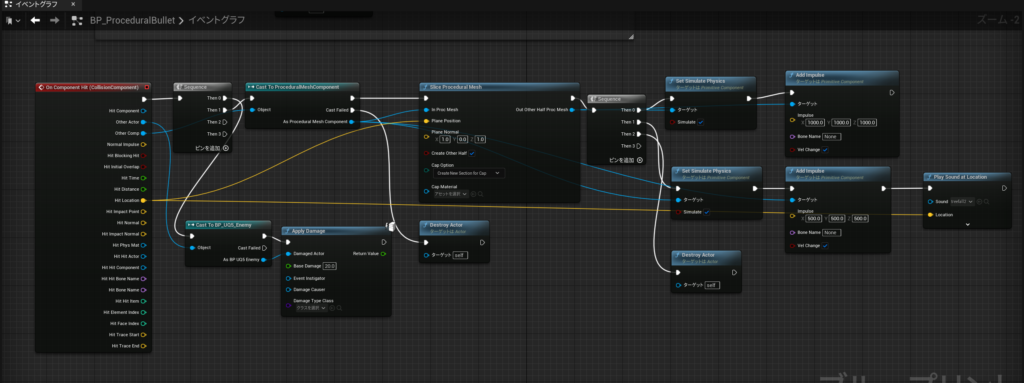
On Component Hit をこのように改造する
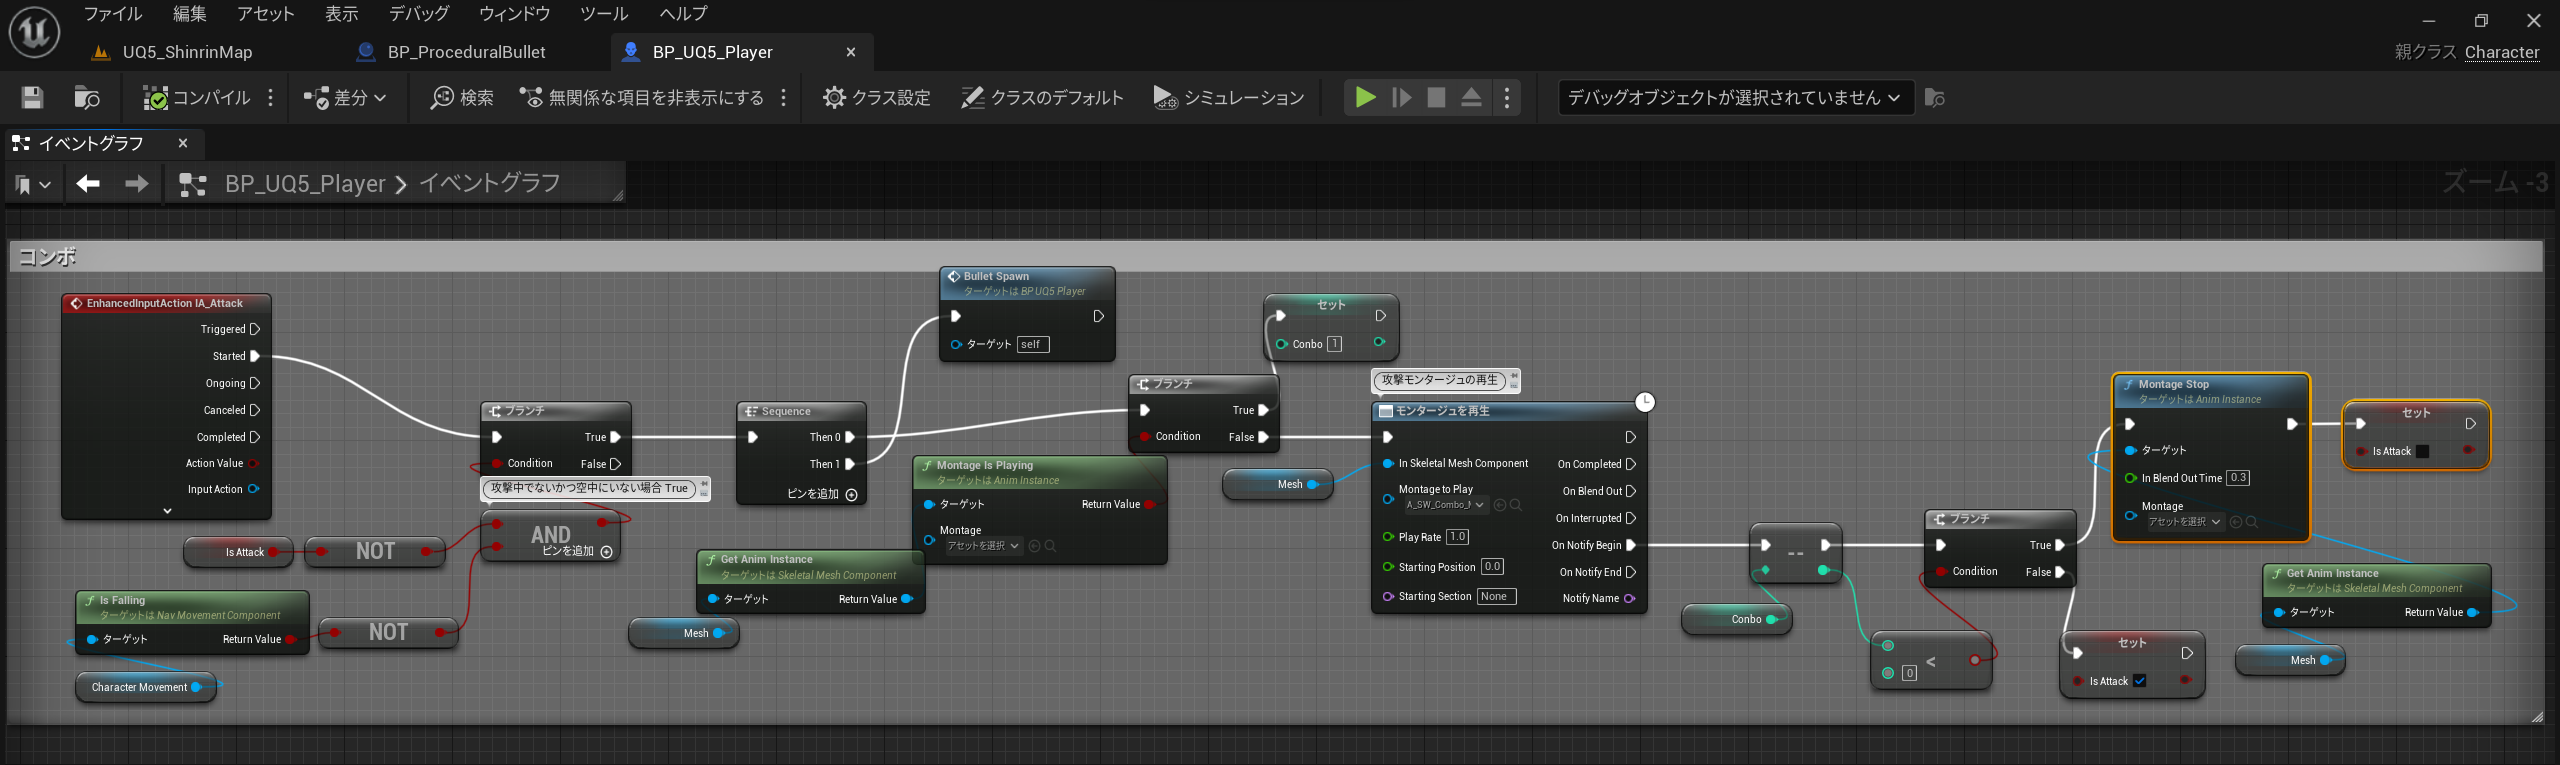
BP_UQ5_PlayerにBullet_Spawnのカスタムイベントを追加
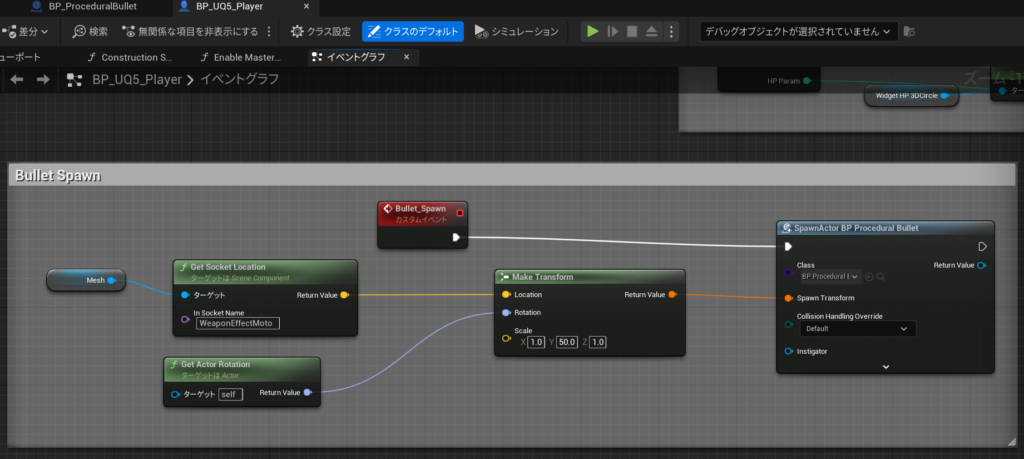
通常攻撃をコンボにカスタムしてあるけど、こんな感じでSequenceでBullet_Spawnを呼ぶ

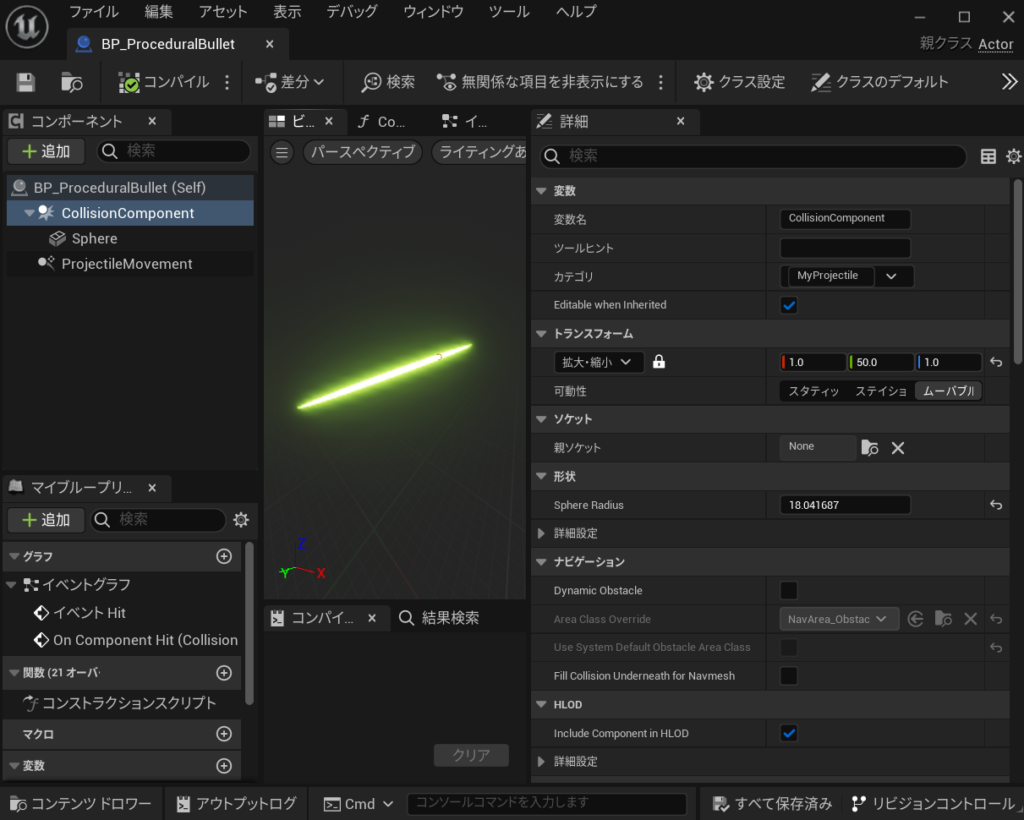
BP_ProceduralBulletの当たり判定がデカくなるようにスケールをデカくした
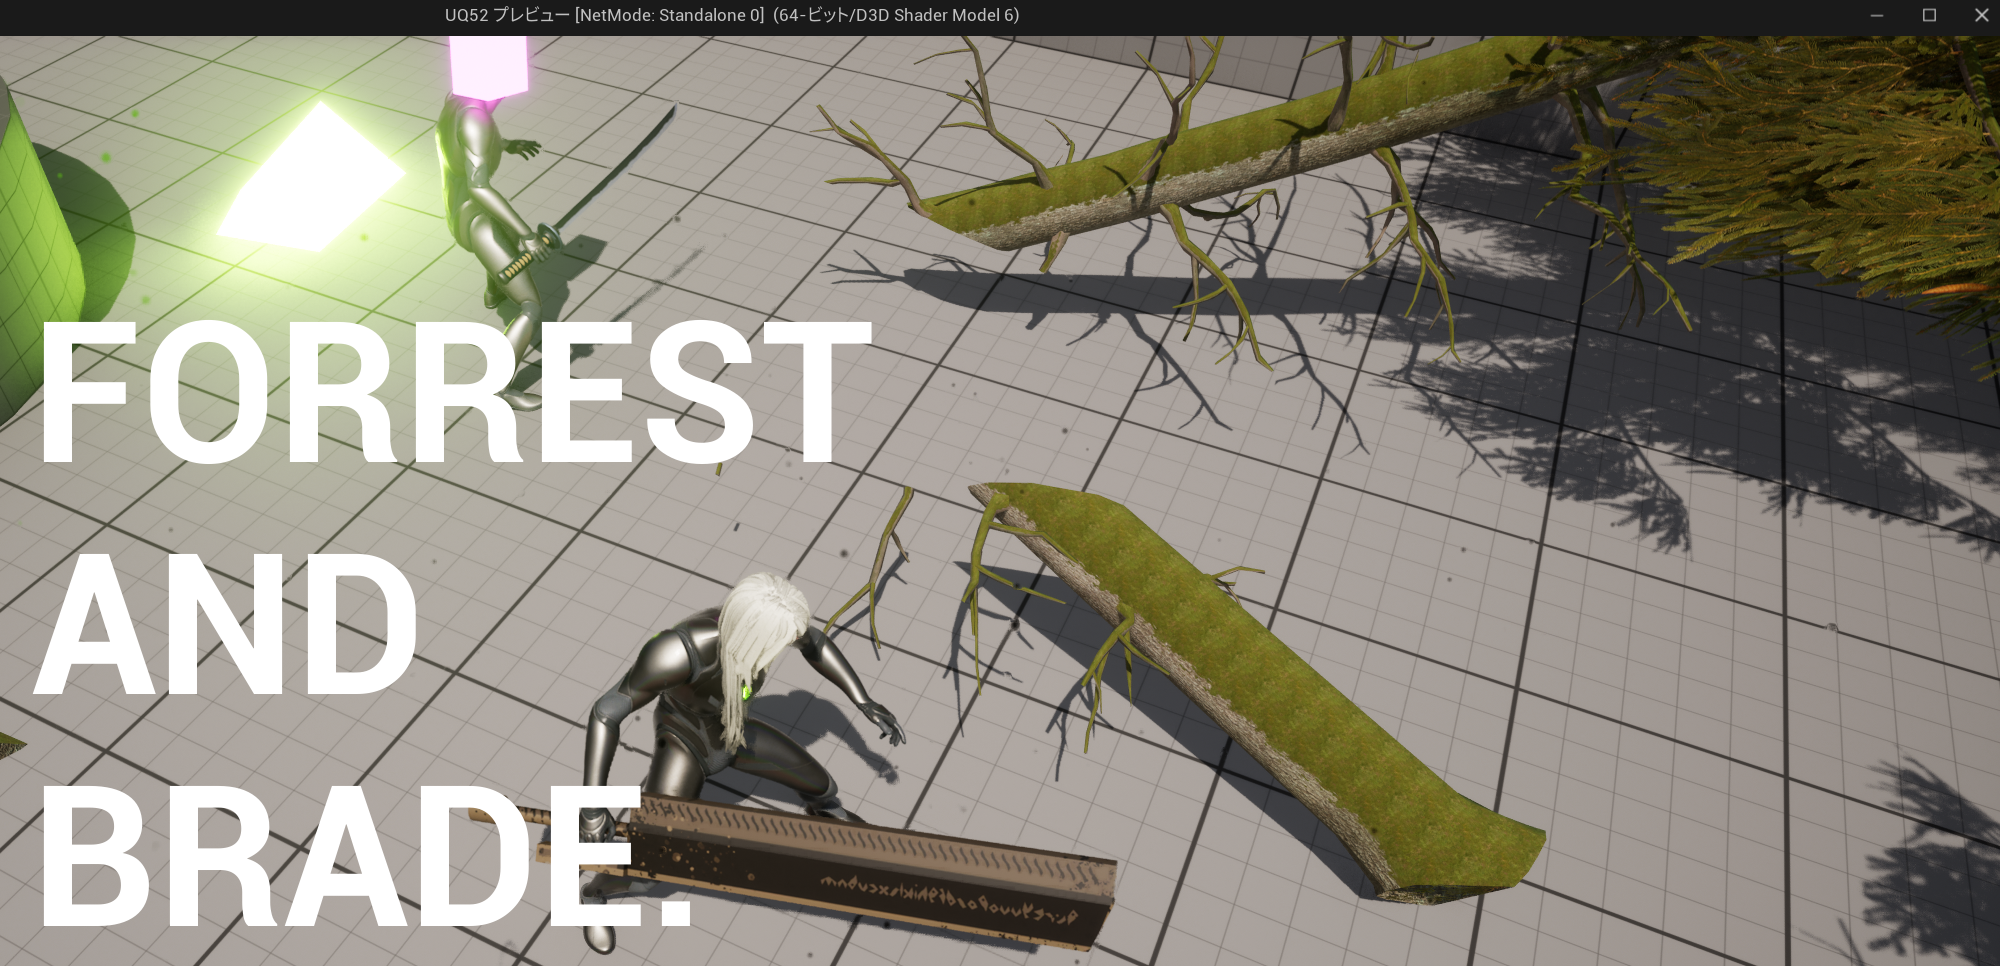
できたのがこちら
アンリアルクエスト5のDiscordでこのページを見た兎月さんがもっとすごい実装方法をしていたので許可を頂いたので、こちらに張らせていただきます
https://uq5.netlify.app/UE5-1-1_Cut_with_a_blade.png

兎月さんに感謝!できたのがこれ。
きもちいですねカットした法線どおりに切れると!
参考サイト
SkeltalMeshをカット?
https://www.unrealengine.com/marketplace/en-US/product/slice-skeletal-mesh-vr?sessionInvalidated=true