
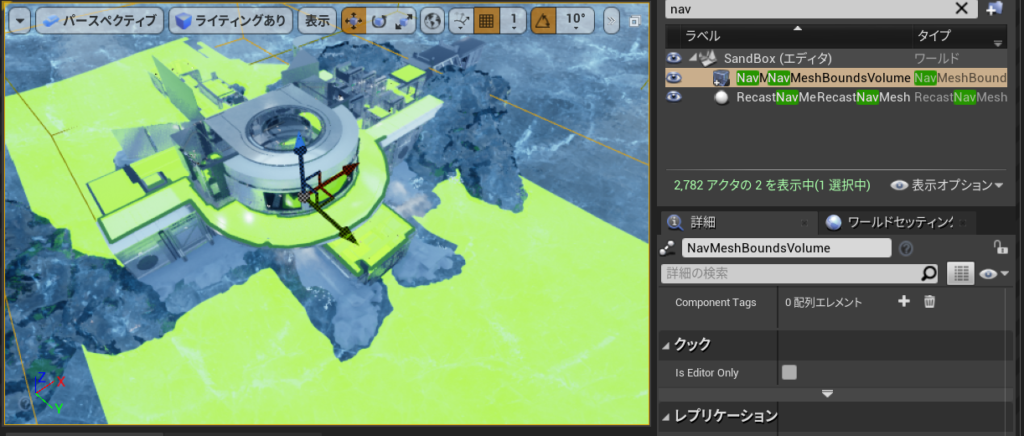
NavMeshを配置して
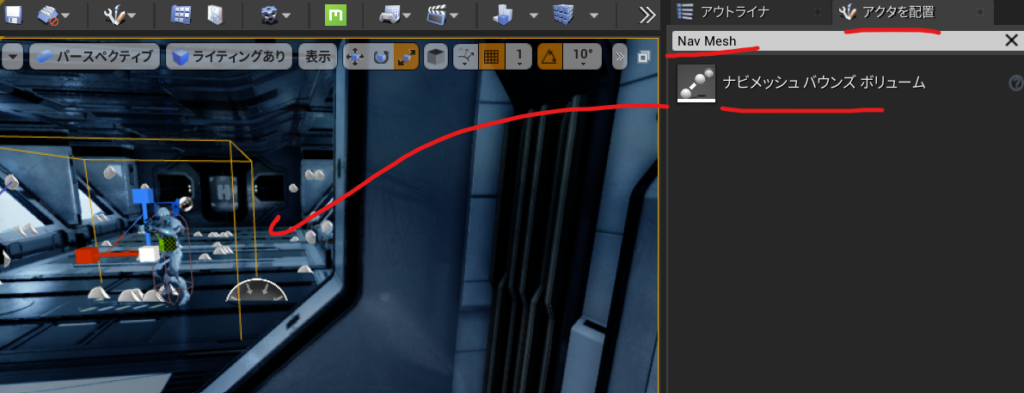
表示できるようにします。
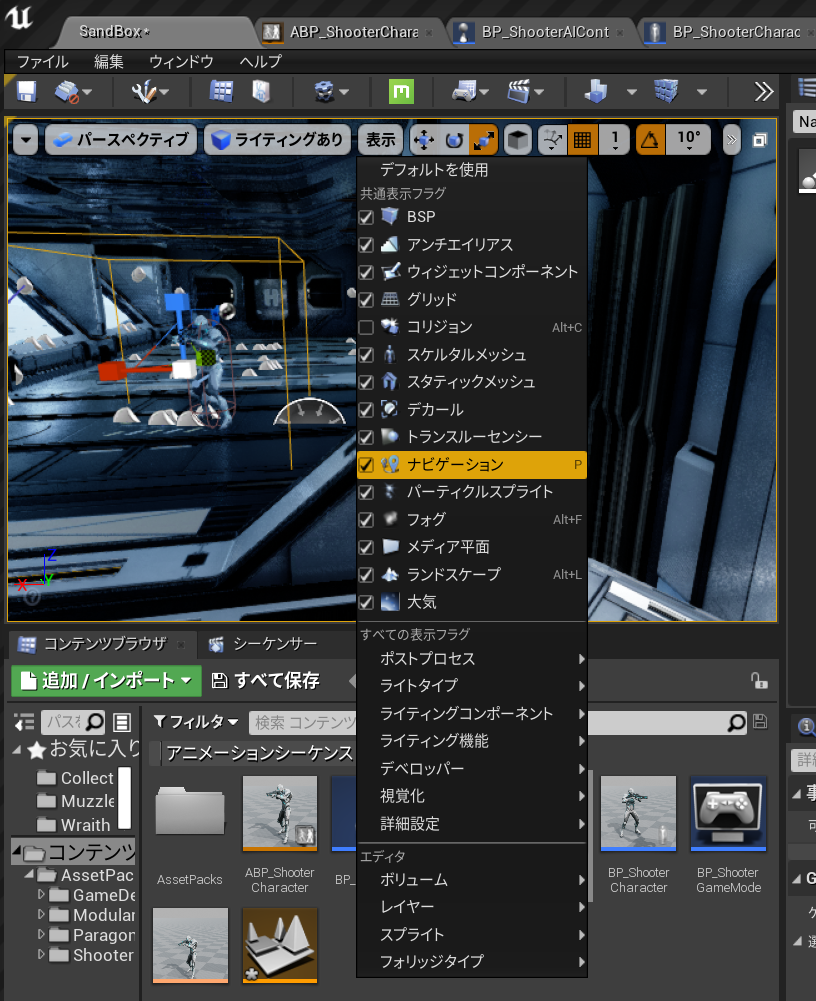
表示されました。
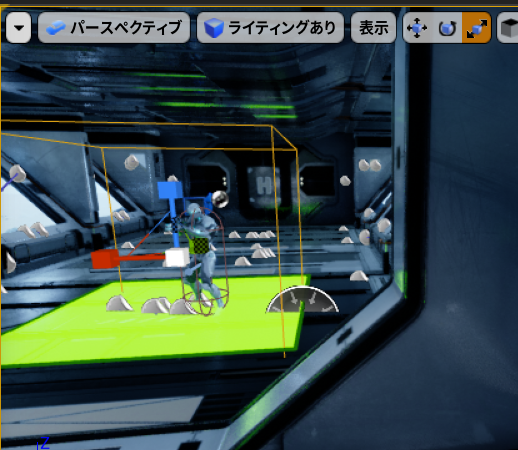
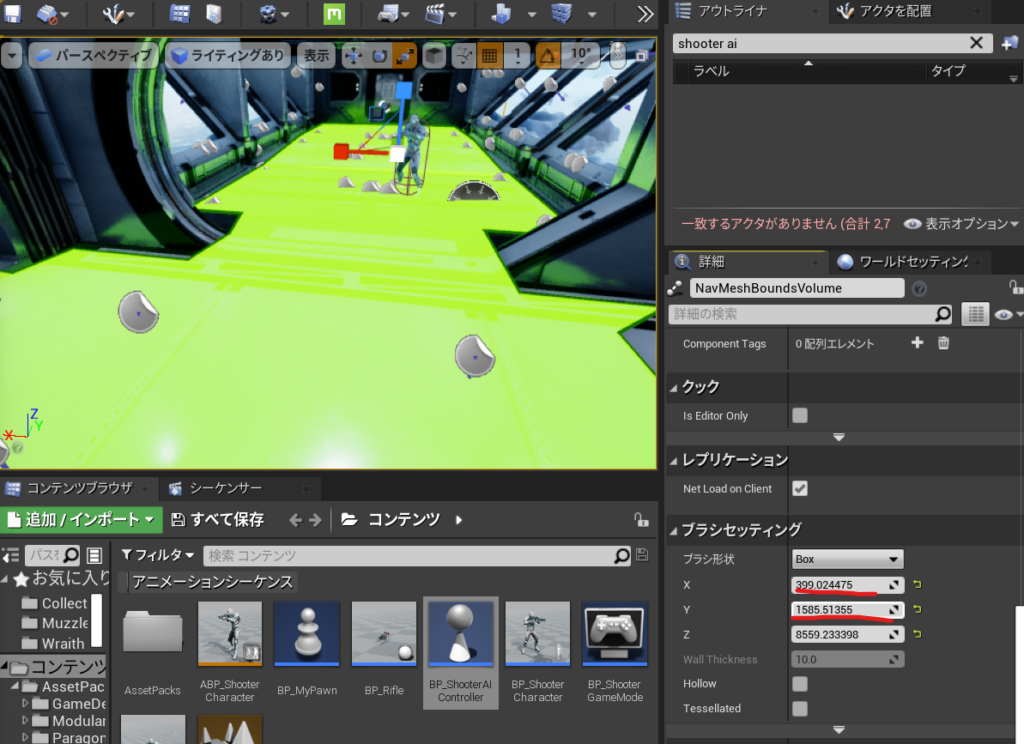
ブラシセッティングで広げます。
BP_ShooterAIControllerを開いてPathFollowingComponentが作用しているからです。
C:\Program Files\Epic Games\UE_4.26\Engine\Source\Runtime\AIModule\Classes\AIController.h
MoveToを見ると
MoveToActor
MoveToLocation
MoveTo
の3つがあります。
	/** AIを指定されたゴールアクターに向けて移動させ(宛先は継続的に更新されます)、
次のアクティブなパスを中止します
* @ paramAcceptanceRadius-ポーンが十分に近づいたら移動を終了します
* @ parambStopOnOverlap-ポーンの半径をAcceptanceRadiusに追加します
* @param bUsePathfinding-ナビゲーションデータを使用してパスを計算します
(そうでない場合は直線になります)
* @param bCanStrafe-フォーカス関連フラグを設定します:bAllowStrafe
* @ paramFilterClass-パスファインディング調整用のナビゲーションフィルター。
指定されていない場合、DefaultNavigationFilterClassが使用されます
* @ parambAllowPartialPath-目標に到達できない場合は不完全なパスを使用します
* @note AcceptanceRadiusは、ヘッダーパーサーが
UPathFollowingComponent :: DefaultAcceptanceRadiusを認識できないため、
デフォルト値または-1になります。*/
	UFUNCTION(BlueprintCallable, Category = "AI|Navigation", Meta = (AdvancedDisplay = "bStopOnOverlap,bCanStrafe,bAllowPartialPath"))
	EPathFollowingRequestResult::Type MoveToActor(AActor* Goal, float AcceptanceRadius = -1, bool bStopOnOverlap = true,
		bool bUsePathfinding = true, bool bCanStrafe = true,
		TSubclassOf<UNavigationQueryFilter> FilterClass = NULL, bool bAllowPartialPath = true);
なので
\ShooterAIController.cpp
// Fill out your copyright notice in the Description page of Project Settings.


#include "ShooterAIController.h"

#include "Kismet\GameplayStatics.h"

void AShooterAIController::BeginPlay()
{
    Super::BeginPlay();
    APawn* PlayerPawn= UGameplayStatics::GetPlayerPawn(GetWorld(),0);

    SetFocus(PlayerPawn);
    MoveToActor(PlayerPawn,200);

}
これでプレイしてみると一度動きます。が一度しかついてきません。
C:\Program Files\Epic Games\UE_4.26\Engine\Source\Runtime\Engine\Classes\GameFramework\Actor.h
virtual void Tick( float DeltaSeconds );をコピーしてShooterAIController.hにTickをオーバーライドしてこうしました。
// Fill out your copyright notice in the Description page of Project Settings.

#pragma once

#include "CoreMinimal.h"
#include "AIController.h"
#include "ShooterAIController.generated.h"

/**
 *
 */
UCLASS()
class SIMPLESHOOTERCP2_API AShooterAIController : public AAIController
{
	GENERATED_BODY()
public:
	virtual void Tick( float DeltaSeconds ) override;

protected:
	virtual void BeginPlay() override;
};
C:\Download\Game\SImpleShooter\SImpleShooterCp2 4.26\Source\SImpleShooterCp2\ShooterAIController.cpp
// Fill out your copyright notice in the Description page of Project Settings.


#include "ShooterAIController.h"

#include "Kismet\GameplayStatics.h"

void AShooterAIController::BeginPlay()
{
    Super::BeginPlay();
    //APawn* PlayerPawn= UGameplayStatics::GetPlayerPawn(GetWorld(),0);


}
void AShooterAIController::Tick(float DeltaSecond)
{
    APawn* PlayerPawn= UGameplayStatics::GetPlayerPawn(GetWorld(),0);
    SetFocus(PlayerPawn);
    MoveToActor(PlayerPawn,200);

}
NavMeshを広げておかないとAIキャラクターが歩きにくいみたいです
できたのがこれ、
AIキャラクターが回転しないバグは次のときに説明するみたい。