
参考サイト
[PHP]Ratchetの初期設定とテキストのリアルタイム通信テスト
Xamppをwindowsをインストール
https://sourceforge.net/projects/xampp/files/XAMPP%20Windows/7.4.33/
お名前.comのPHPが7.4なので
をダウンロードした。
システム環境変数にphpのパスを通す
C:\xampp\phpPHPのバージョン確認
PS C:\xampp\htdocs> php -v
PHP 7.4.33 (cli) (built: Nov  2 2022 16:00:55) ( ZTS Visual C++ 2017 x64 )
Copyright (c) The PHP Group
Zend Engine v3.4.0, Copyright (c) Zend Technologies
PS C:\xampp\htdocs>
Composerをインストール
php -r "copy('https://getcomposer.org/installer', 'composer-setup.php');"
php -r "if (hash_file('sha384', 'composer-setup.php') === 'e21205b207c3ff031906575712edab6f13eb0b361f2085f1f1237b7126d785e826a450292b6cfd1d64d92e6563bbde02') { echo 'Installer verified'; } else { echo 'Installer corrupt'; unlink('composer-setup.php'); } echo PHP_EOL;"
php composer-setup.php
php -r "unlink('composer-setup.php');"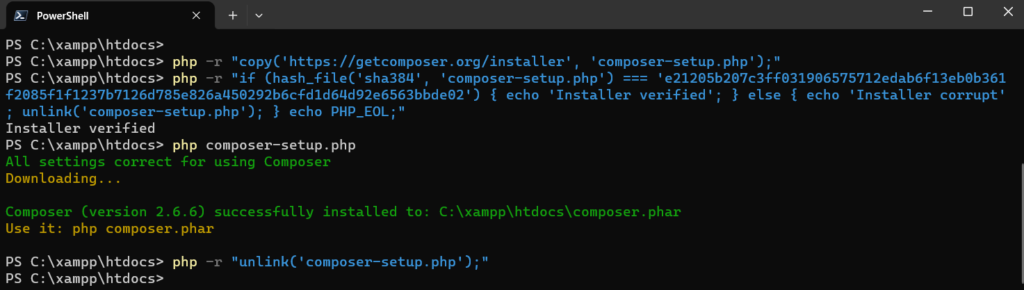
XAMPP の htdocs ディレクトリに任意の名前のフォルダを作成し、ターミナルでアクセスできる状態にします。この例では MyChat というフォルダ名にしています。
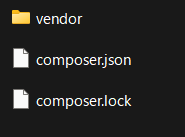
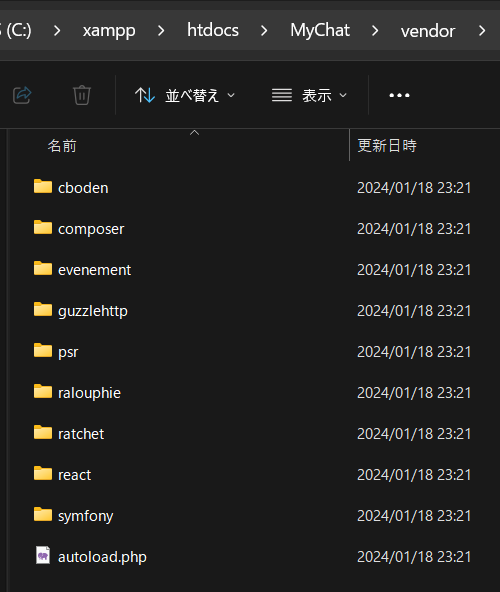
php ../composer.phar require cboden/ratchetこんなファイルが出てきます。
composer.json を開き autoload の5行を追記します。
{
    "autoload": {
        "psr-4": {
            "MyApp\\": "src"
        }
    },
    "require": {
        "cboden/ratchet": "^0.4.3"
    }
}
ディレクトリ MyChat にフォルダ src/ を作成し、その中に(Chat.php)を作成します。
<?php
namespace MyApp;
use Ratchet\MessageComponentInterface;
use Ratchet\ConnectionInterface;

class Chat implements MessageComponentInterface {
    public function onOpen(ConnectionInterface $conn) {
    }

    public function onMessage(ConnectionInterface $from, $msg) {
    }

    public function onClose(ConnectionInterface $conn) {
    }

    public function onError(ConnectionInterface $conn, \Exception $e) {
    }
}
同様にフォルダ bin/ を作成し、その中にスクリプト(chat-server.php)を作成してください。
<?php
use Ratchet\Server\IoServer;
use MyApp\Chat;

    require dirname(__DIR__) . '/vendor/autoload.php';

    $server = IoServer::factory(
        new Chat(),
        8080
    );

    $server->run();
以上のスクリプトを作成後、ターミナルで以下のコマンドを入力してください。
php bin/chat-server.php正常に動作するとターミナルには何も表示されないはずですが、以下のようなエラーが表示される場合があります。
PS C:\xampp\htdocs\MyChat> php bin/chat-server.php
PHP Fatal error:  Uncaught Error: Class 'MyApp\Chat' not found in C:\xampp\htdocs\MyChat\bin\chat-server.php:8
Stack trace:
#0 {main}
  thrown in C:\xampp\htdocs\MyChat\bin\chat-server.php on line 8

Fatal error: Uncaught Error: Class 'MyApp\Chat' not found in C:\xampp\htdocs\MyChat\bin\chat-server.php:8
Stack trace:
#0 {main}
  thrown in C:\xampp\htdocs\MyChat\bin\chat-server.php on line 8
PS C:\xampp\htdocs\MyChat>
もしこのエラーが表示されたなら composer.phar のアップデートを実行してみてください。アップデートのコマンドは以下のとおりです。
php ../composer.phar update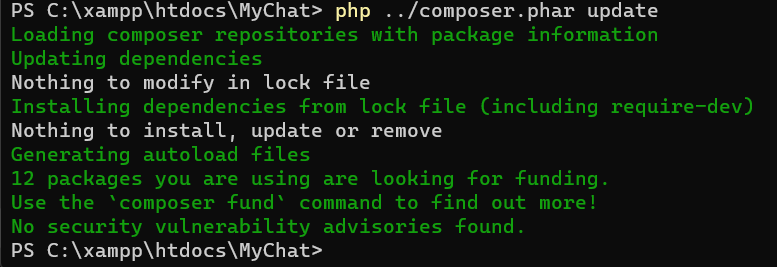
php bin/chat-server.php正常に動作した場合は control+C で終了させてください。

以上で通信のための準備が整いました。
メッセージ送信の実行
実際に通信をテストするには、まず Chat.php を以下のように書き換えます。
<?php
namespace MyApp;
use Ratchet\MessageComponentInterface;
use Ratchet\ConnectionInterface;
class Chat implements MessageComponentInterface {
protected $clients;
public function __construct() {
$this->clients = new \SplObjectStorage;
}
public function onOpen(ConnectionInterface $conn) {
// Store the new connection to send messages to later
$this->clients->attach($conn);
echo "New connection! ({$conn->resourceId})\n";
}
public function onMessage(ConnectionInterface $from, $msg) {
$numRecv = count($this->clients) - 1;
echo sprintf('Connection %d sending message "%s" to %d other connection%s' . "\n"
, $from->resourceId, $msg, $numRecv, $numRecv == 1 ? '' : 's');
foreach ($this->clients as $client) {
if ($from !== $client) {
// The sender is not the receiver, send to each client connected
$client->send($msg);
}
}
}
public function onClose(ConnectionInterface $conn) {
// The connection is closed, remove it, as we can no longer send it messages
$this->clients->detach($conn);
echo "Connection {$conn->resourceId} has disconnected\n";
}
public function onError(ConnectionInterface $conn, \Exception $e) {
echo "An error has occurred: {$e->getMessage()}\n";
$conn->close();
}
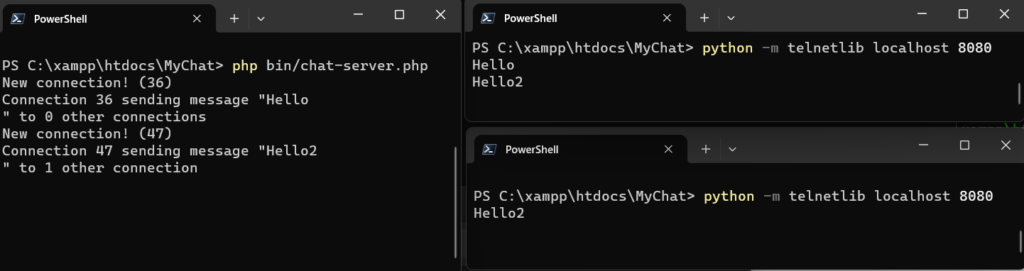
}そして、ターミナルのウィンドウを3つ開き、それぞれ以下のコマンドを入力します。
php bin/chat-server.phptelnet localhost 8080telnet localhost 8080もし telnet がないと言われた場合は python を利用する以下のコマンドを試してみてください。
python -m telnetlib localhost 8080実行結果です。一方のtelnetにメッセージを入力すると、他方にメッセージが表示されます。接続状態などは bin/chat-server.php を実行したウィンドウに表示されます。
ブラウザを利用したメッセージの送信
chat-server.php を以下のように書き換えます。
<?php
use Ratchet\Server\IoServer;
use Ratchet\Http\HttpServer;
use Ratchet\WebSocket\WsServer;
use MyApp\Chat;

    require dirname(__DIR__) . '/vendor/autoload.php';

    $server = IoServer::factory(
        new HttpServer(
            new WsServer(
                new Chat()
            )
        ),
        8080
    );

    $server->run();
ターミナルで再度 bin/chat-server.php を実行し、
MyChat/index.htmlに以下のHTMLフォームボタンで動くとjavascriptを入力します。
<br><br><br><br><br><br><br><br>
<a href="javascript:myFunction();">リンクでJSのmyFunction()実行</a>
<script>
function myFunction() {
// フォームボタンがクリックされたときの処理をここに記述

//------------------------------------------------------
var conn = new WebSocket('ws://localhost:8080');
conn.onopen = function(e) {
    console.log("Connection established!");
};

conn.onmessage = function(e) {
    console.log(e.data);
};
//------------------------------------------------------
alert('入室しました!');
}
</script>
実行結果は以下のとおりです。
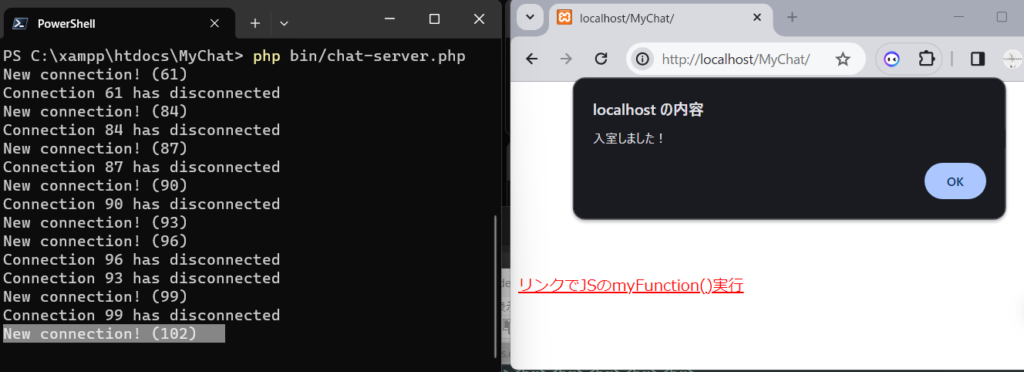
ターミナルにブラウザから send によって送信したメッセージが表示されました。
以上、Ratchetの初期設定と、それを利用した通信の例でした。